Embracing the Impressions: A Brief Overview of Printmaking
Printmaking, an artistic endeavour that has left an indelible mark on human creativity, is often underappreciated in its complexity and diversity. It’s a fascinating world encompassing various techniques that artists use to create multiple original works of art.
Each technique holds a unique charm, from the mesmerising lines of etching to the bold forms of lithography. Yet all share a common genesis – they begin with an original plate or block which is carefully prepared by the artist to hold ink in specific areas while repelling it in others.
When we think about printmaking, it might be easy to pigeonhole it as a world reserved for artists or those with dexterous hands and nimble fingers. Yet printmaking can be accessible and enjoyable for everyone – all it takes is an appreciation for creativity and patience.
Linocut and Woodcut: The Majestic Titans Looming over the Realm of Relief Printing
Wading through this captivating ocean that is printmaking, one would inevitably come across two looming titans – linocut and woodcut printing. These two techniques fall under relief printing, a process where pieces are carved away from a flat surface to create an image; only the raised areas left behind will hold ink while recessed areas remain ink-free.
The mystique appeal of these methods lies not just within their roots steeped in ancient history but also their ability to produce distinct aesthetic results. Woodcut bursts forth with strong lines and robust textures whereas linocut seduces us with its versatility and crisp impressions.
Both offer something unique to artists – tangible connections between their hands, tools, materials, and final prints. Whether you’re looking to explore your creative journey or merely seeking knowledge out of curiosity’s sake, understanding these two giants can open doors into new realms of possibility waiting for you in printmaking magic.
The Woodcut Wonderland
A journey through time: The origins of woodcut
Embarking on a journey into the world of woodcut printmaking, we must first take a step back in time. Woodcuts emerged around the 5th century in China, before moving through the Middle East and finally arriving in Europe around the 14th century. During this period, woodcuts were primarily used to create religious icons and depict biblical narratives.
It was not until the Renaissance that they began to gain recognition as a fine art form. The late Middle Ages saw an increased use of woodcuts for book illustrations due to their easy reproducibility.
This permitted a wider dissemination of knowledge and visual imagery at a time when accessibility to such resources was growing rapidly. From sacred religious texts to secular works of literature, woodcuts permeated every sphere of written expression.
From log to print: Breaking down the process
Finding your foundation: Selecting suitable wood
Understanding the type of wood best suited for your project is crucial in obtaining optimal results. Traditionalists might turn towards hardwoods like cherry or pear due their fine grain detail and longevity whereas beginners may favor softer woods like pine or birch for easier carving.
While hardness affects how much pressure you need to apply while carving, grain structure influences detail precision – coarse grains can interrupt intricate lines while finer grains offer smoother cuts. Since each piece has unique characteristics even if it belongs to same species, selecting the right piece becomes an art itself – one that requires patience and understanding.
The artistry in slicing: Developing carving techniques
Once you’ve found your perfect piece, it’s time for carving – arguably one of most satisfying steps! An immense variety exists within cutting tools; from “v-gouges” for creating fine lines, “u-gouges” for broader strokes or flat chisels precise shapes.
Each tool leaves its trace on workpiece leaving an artist’s signature style behind. Learning efficient hand positioning is key too!
The direction of force application changes based on whether you’re making long sweeping cuts or short delicate ones. Practice makes perfect here so don’t shy away from experimenting with styles!
Taking impressions: Inking up & printing
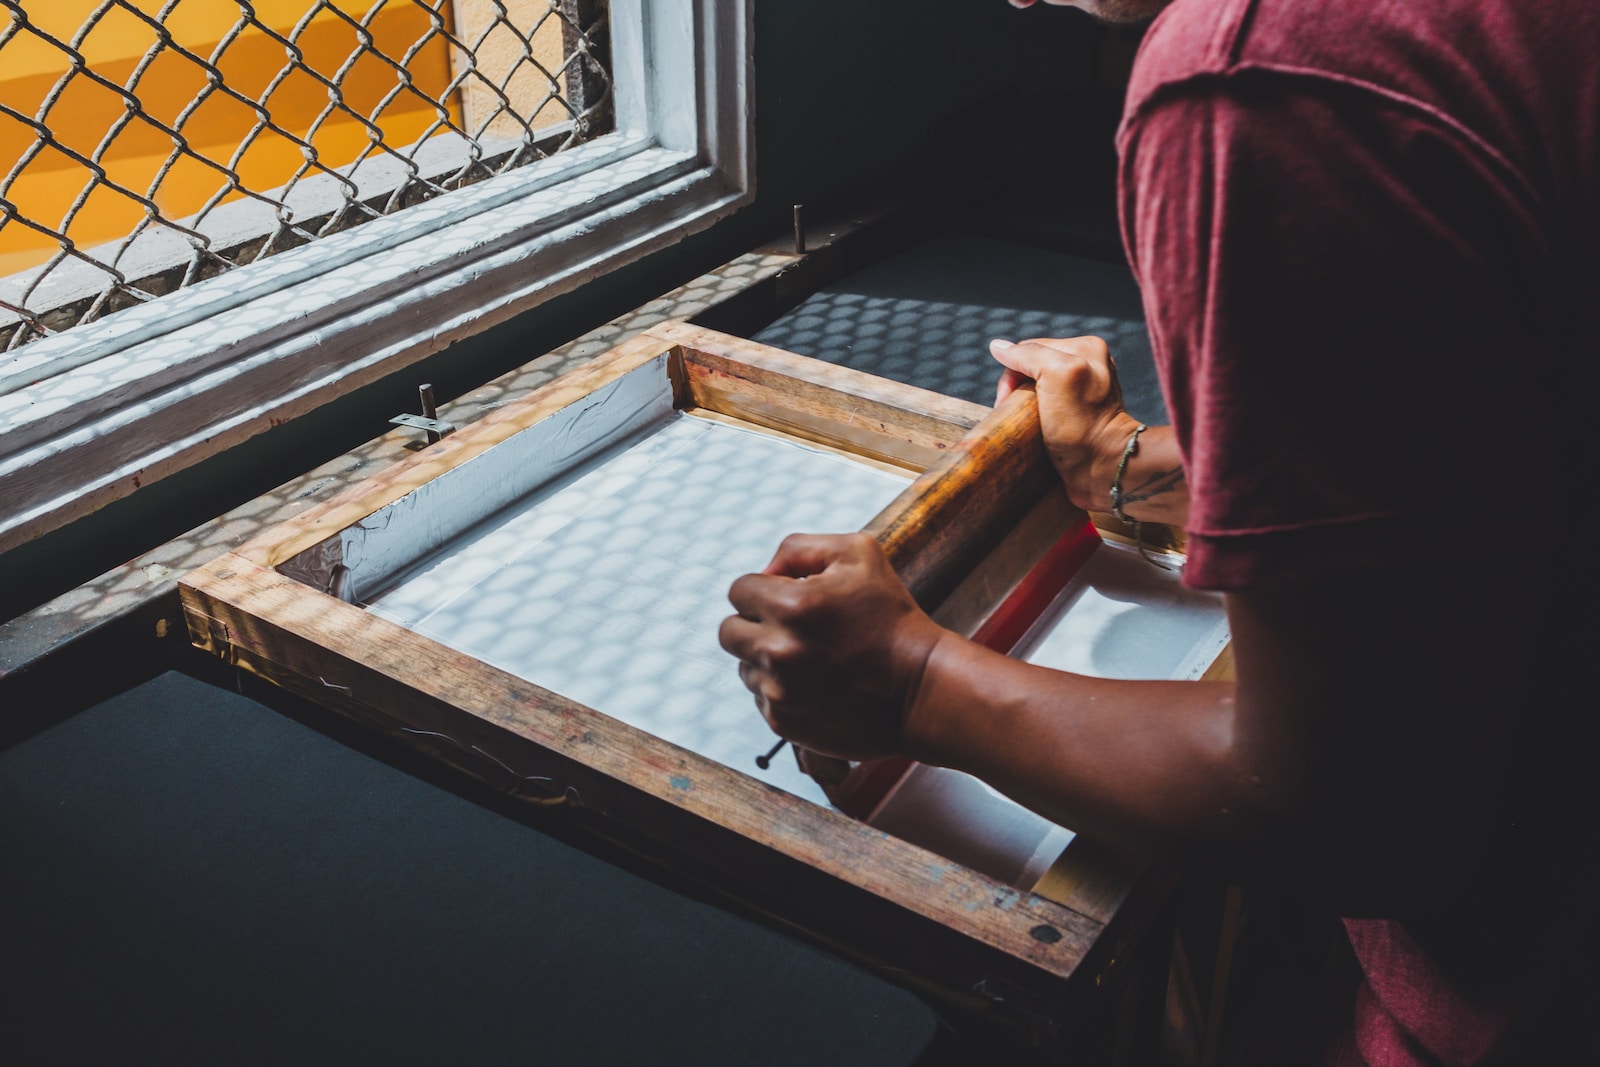
With your design carved out meticulously across the wooden surface, it’s now ready for ink application using rubber rollers known as ‘brayers’. It’s vital that enough ink is applied evenly across raised areas while avoiding saturation which could cause blotching during printing. Your inked block then gets pressed against paper either manually or using press machine – voila!
Your handmade print is ready! Note though that each impression might vary slightly depending upon ink coverage and pressure applied making every print unique!
Echoes from past: Celebrating notable artists & works
Woodcut’s rich history boasts myriad artists who’ve left indelible marks on this medium like Albrecht Dürer whose “Four Horsemen”, part his Apocalypse series has often been hailed as epitome technical proficiency during Northern Renaissance era with its intricate detailing and powerful storytelling capabilities. Katsushika Hokusai’s “Great Wave off Kanagawa” serves another pinnacle this medium showcasing Japanese Ukiyo-e style prints where instead single color traditional western works multiple colors were used creating vivid picturesque scenes
Weighing up our timber: Advantages & disadvantages using wood
Opting work with wood presents set unique benefits drawbacks alike On one hand nature inherent texture offers charming rustic appeal prints Also since less prone wear tear compared other mediums can reused multiple times On flip side hardwoods especially present steep learning curve beginners due their firmness They also tend more expensive thus impacting cost project Furthermore getting hold perfectly seasoned block without any knots cracks prove challenging times But once mastered rewards reaped working with timber are well worth effort invested
The Linocut Landscape
An Echo from the Past: Linocut’s Origin Story
Tracing the linoleum’s footprints back in time, we land in the bustling heart of Victorian England. Created as a cheaper and more resilient alternative to wood flooring, linoleum was quickly adopted by artists for its unique qualities that made it ideal for printmaking. Linocut emerged as a distinct form of art around 1900 but reached its zenith amid the die Neue Sachlichkeit or ‘New Objectivity’ movement in Germany during the 1920s and ’30s.
The artists of this period were particularly drawn to linoleum due to its softness, contrasting starkly with the rigidity of wood but offering an easier medium to carve intricate designs. Unlike woodcuts which required seasoned expertise, linocuts became popular among amateurs and professionals alike, democratizing printmaking like never before.
Linocut Printmaking Unveiled: A Step-by-Step Journey
Diving into Lino Land: Picking Out Your Lino Material
The first step on your journey into the world of linocut is selecting your linoleum – often referred to as lino. This material can be found in different grades – hard or soft – each serving their own purpose.
For beginners, it’s advisable to start with softer lino as it’s easier to carve. When choosing your lino block remember that quality matters!
A good quality block will result in a smoother carving experience and ultimately better prints. Ensure there are no visible flaws on the surface; these could disrupt your design when you start carving.
Meet Your Inner Sculptor: Carving Your Design
Carving a design into lino shares similarities with sculpting; both require patience, precision and an eye for detail! Start by sketching your design onto paper before transferring it onto your chosen lino block using tracing paper. Once you’re happy with how everything looks, grab your carving tool (also known as gouge) and start carving away sections where you want white or negative space.
Remember that whatever isn’t carved away will be inked up and printed later on so think carefully about where you want those contrasts! Also, keep safety paramount – always carve away from yourself.
The Magical Transformation: Inking Up & Making Impressions
Once happy with your carved design (or ‘block’), you’ll need printing ink and rollers (brayers). This stage can get messy but oh-so-fun!
Roll out some ink on a smooth surface until it’s evenly spread across your roller then apply this over your carved block gently ensuring all raised areas are covered well. Then place a piece of paper atop of this inked-up block then press firmly using either pressure from hand or printing press if available.
Carefully remove the sheet et voila! You have successfully created a beautiful linocut print!
Celebrating Masters in Linoleum: Notable Artists & Their Works
The luminaries of linocut provide inexhaustible inspiration for aspiring artists everywhere – let’s spotlight two colossal pioneers who championed this medium. Pablo Picasso is one such maestro whose tryst with linocuts produced some awe-inspiring works like “Le Vieux Roi”.
Another titan who embraced this method was Henri Matisse – his series “Jazz” is an exquisite example where vibrant colors explode off his cut-out designs. These titans brought gravitas to what was considered an inferior medium compared to traditional methods like woodcuts or even painting.
The Delicate Balance: Weighing Pros & Cons of Linoleum
Just like anything else under the sun, working with lino also has highs and lows which we must consider before diving headlong down this artistic rabbit hole. On one hand are benefits like ease-of-use (especially beginners love it!), durability under pressure allowing multiple prints without degradation, flexibility when handling complex designs because it doesn’t splinter unlike wood – these things make it appealing for many creatives! However every coin has two sides – so does working with lino!
It doesn’t impart as rich texture as wood does because surface isn’t exactly granulated plus over time exposed blocks can become brittle ruining fine details within carvings. Despite these drawbacks however many continue exploring potentialities offered by humble linoleum block propelled forward by sheer love for artistry innate within this unique technique!
Face-Off – Comparing Linocut vs Woodcut
The Medium is the Message: Differences in Working with Lino vs Wood
In the world of relief printmaking, your choice of medium determines not only the process but also the outcome. Linoleum, or lino for short, is softer and more malleable than wood.
This makes it considerably easier to carve and allows for more intricate designs, especially beneficial for beginners or those seeking a quicker process. However, its softness can also be its downfall as it tends to wear down quicker than wood.
Wood, on the other hand, offers a sturdier working surface. Its hardness allows it to withstand multiple print runs without losing detail – a crucial factor when creating editions.
The grain of the wood also provides a unique textural element that can’t be replicated with linoleum. However, carving into wood requires more effort and experience; hence it might feel daunting to novices.
Talking Point: How Carving Techniques Differ for Each Medium
Despite both being relief printing methods, linocut and woodcut require slightly different approaches when it comes to carving. As lino is softer and less resistant than wood, you can carve your design using lighter pressure and simpler tools like lino cutters or even hobby knives. The ability to produce smoother curves facilitates detailed designs with less risk of accidental slips.
Woodcut carving needs stronger tools such as gouges and chisels due to the material’s toughness. This robustness ensures deeper cuts which result in bold lines and dramatic contrast between printed areas and untouched ones—the grain naturally interacting with your cuts adds an organic texture that enhances every print’s uniqueness.
The Artistic Showdown: Comparing Visual Effects of Both Methods
The visual differences between linocut prints and woodcuts are subtle yet distinct enough for keen eyes. Linocuts often exhibit smooth lines due to their softer surface—translating into prints that are clean-cut with an impressively modern feel. In contrast, woodcuts bear an intrinsic rugged charm courtesy of their interaction with natural grains—resulting in prints carrying a distinctive texture alongside their bold strokes—a testament to their historical artistic lineage dating back centuries.
Penny Pinching: Which Method is More Wallet-Friendly?
Your budget may play a role in choosing between these two techniques. Generally speaking, linoleum tends to be cheaper than high-quality printmaking wood—making it an excellent choice if you’re just starting out or experimenting on a tight budget.
On the other hand, while premium-grade woods can be pricier initially—they may offer better value over time given their durability under multiple impressions without loss of detail—a crucial aspect if you’re planning long series runs or seeking archival quality outcomes. Remember though that cost implications aren’t limited just to materials—you’ll want also consider tooling expenses as well—linocutting tools are generally cheaper but wear out faster compared to heavier-duty chisels required for woodworking which although costlier upfront tend last longer before needing replacement.
Getting Experimental – Mixing Up Techniques
The Artful Alchemy of Multi-Block Prints
Once you’ve mastered both linocut and woodcut printmaking in their most basic forms, it’s time to elevate your craft by exploring multi-block techniques. As the name insinuates, multi-block printing involves using more than one block to create a single artwork.
This may sound complex, but the results can be quite exquisite. Multi-block prints allow for the use of several colors within one piece, each color requiring its own separate block.
The blocks are carved and inked independently, then carefully aligned (or ‘registered’) for consecutive printing on a single sheet of paper. This meticulous process allows artists to masterfully merge linocut and woodcut techniques into intricate, vibrant artworks.
A Journey into Reduction Printing
In contrast to multi-block printing where multiple blocks are used, reduction printing uses just one block which is gradually reduced with successive cuttings and subsequent printings in different colors on the same print. It’s like creating layers of history within one piece because once you carve away a portion of your block for the next layer of color, there’s no going back – it truly tests both your planning skills as well as your acceptance of imperfection.
Aptly known as ‘suicide prints’, this method demands precision and commitment from artists given its irreversible nature. However challenging though, reduction prints can yield stunningly complex images that showcase depth and detail unseen in single color works.
Merging Worlds: Combining Materials for Hybrid Prints
The realm of printmaking is vast and endlessly innovative; thus enters hybrid prints – an exciting fusion where linocuts coalesce with woodcuts or other mediums like etching or lithography within a single work. By combining materials or methods from different techniques into one piece – let’s say having a linoleum block printed over a woodcut layer – you can create an array of textures and visual effects that are truly awe-inspiring.
This approach opens up an arena for experimentation not confined by traditional rules or boundaries, allowing artists to push their creativity beyond limits while simultaneously expanding their skills across various platforms. So take this invitation to indulge in artistic alchemy; mix up those blocks and methods – the results could be pure gold!
The Final Stroke: Deciding Between Linocut and Woodcut
In the grand scheme of printmaking, the choice between linocut and woodcut is not a matter of superiority; rather, it’s about aligning your creative vision with the medium that best manifests it. To some artists, the texture and unpredictable nature of wood make it an irresistible canvas for their creativity.
The grain patterns can add unexpected elements to your artwork, lending a unique charm that’s inherently organic. Conversely, linocut might appeal to those who prefer a smoother surface for more intricate designs.
Although less challenging in terms of carving techniques compared to woodcuts, linocuts still demand precision and patience. Its uniformity allows more control over the final outcome – perfect for artists whose style leans towards detailed precision.
Printmaking Odyssey: Embrace Your Artistic Journey
Remember, neither choice is superior or inferior; both mediums have their own merits and potential pitfalls. Each can provide a uniquely satisfying tactile experience – from feeling the resistance of your carving tool against lino or learning how to navigate around knots in a block of wood. Your decision should be driven by your personal artistic goals.
Choose what most resonates with you or even better; don’t limit yourself to one medium! Explore both realms – allow yourself to appreciate and get lost in their distinct nuances and intricacies.
And Now…The End Is Near
Whether you decide on linocut or woodcut printmaking (or perhaps even both!), remember that each has its own beauty and challenges. It’s all about discovering which one speaks most authentically to your creative spirit while satisfying your desire for technical mastery.
So go ahead! Pick up that carving tool and immerse yourself in the invigorating world of printmaking – an artistic journey awaits!